

How To Create A Search Bar using HTML, CSS & JS
Let's learn to create a search bar


Introduction
In this tutorial, we are going to add a search bar in HTML to your site!
I will walk you through all the components you need to add a search bar in HTML.
For those in a rush, the complete solution is at the bottom of the page. For those who want the deep dive keep reading!
Create a search icon inside input box with HTML and CSS
Displaying a search icon inside an input box is a nice way to indicate to the user that it is indeed a search input.
Google Search Input

CodePen Search Input

- Gmail Search Input

Markup
The HTML for our search box with an icon will consist of a form, input, and button elements.
Let's start with the HTML that we need to create a form.
HTML Form
The first thing we need to add is the bar itself. This uses a few HTML elements:
<form id="form">
  <input type="search" id="query" name="q" placeholder="Search...">
  <button>Search</button>
</form>
<form>- This element is for user input. The form will act as a wrapper, as well as will react to the submit event.<input>- This element has many types the one we will use today is search. The input element should have a type attribute equal to the search value. It will ensure a better usability on mobile devices. The keyboard with a layout suited for search will be shown.<button>- This element will submit the form and start the search. The proper button type will ensure the form can be submitted via button click without additional events for this button. The button will also act as an icon.
NOTE: To improve UX you can also specify an input placeholder e.g. “Search…”. This will give a user an additional hint that this is indeed a search input.
There are a few attributes that we are using on the input tag. Let's look at these in more detail:
- type - This sets how the input looks on the screen. There are many types such as password, checkbox and radio yet here we are using search
- id - Setting an ID can make it easy to reference the input box from JavaScript which we will use later
- name - It is common to use “q” for the search query box name
- placeholder - This is some text that gives a hint to the user on what the input is for
When the HTML displays on the browser it looks like this:

Our form is not quite finished yet, we need to make sure that screen readers can use it for accessibility.
To do this we have to make two changes to the form:
We need to add a role to the form with the value of “search”. Setting this will cause the screen readers to announce that this form is a search form.
We add an aria-label attribute to the input element. The screen reader will read aloud the value of this attribute. Set a value that describes what text the search form returns such as “Search through our site content”.
This is our final HTML:
<form id="form" role="search">
  <input type="search" id="query" name="q"
   placeholder="Search..."
   aria-label="Search through site content">
  <button>Search</button>
</form>
Styling
Next, we are going to look at making a form pretty by styling the form with CSS.
CSS adds style to the search bar changing its look and feel.
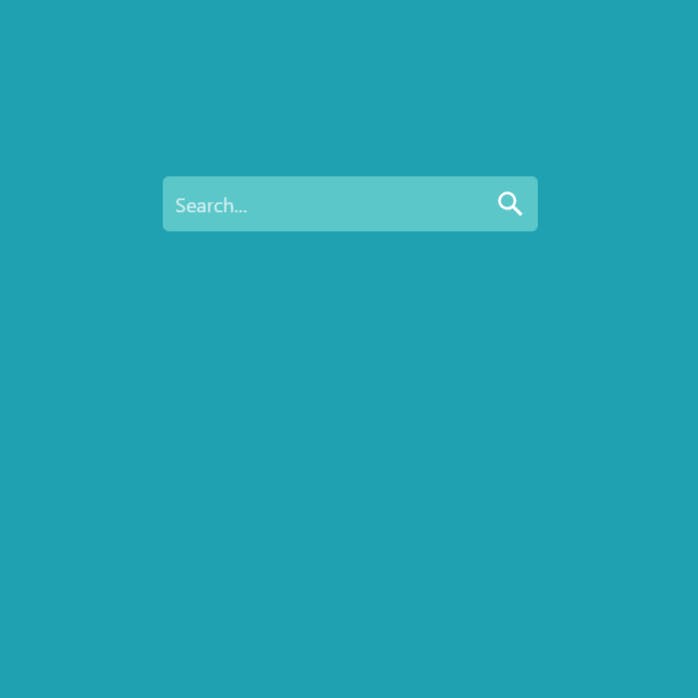
One addition that can help the user find the search box is to add a magnifying glass or search icon. We will add one of these to the button and create a search box that looks like this:
- First, we have added some color to the form itself:
form {
        background-color: #5bc7c9;
        width: 300px;
        height: 44px;
        border-radius: 5px;
        display:flex;
        flex-direction:row;
        align-items:center;
      }
We have set the width and height of the form. We also arrange the items in the form using the flex display.
- Next, we change the look of the input search box:
input {
  all: unset;
  font: 16px system-ui;
  color: #fff;
  height: 100%;
  width: 100%;
  padding: 6px 10px;
}
The first line above resets the search box all: unset; design. Many browsers add their own design and it can be hard to style. This can make it easier to style as we need.
Then we set the font and make sure that the search bar fills the space with height and width. Lastly, we have added a bit of padding.
The next CSS rule is a bit strange! It allows us to set the style of the placeholder text inside the search box. The default is grey text, to change this we need to use this rule:
::placeholder {
  color: #fff;
  opacity: 0.7;
}
The last CSS rules change the look and feel of the button. You can see here that we have replaced the search button with a search icon.
To do this I have changed the HTML of the button to now include a svg. The svg is an image of the search icon, it now looks like this:
<form role="search" id="form">
  <input type="search" id="query" name="q"
   placeholder="Search..."
   aria-label="Search through site content">
  <button>
    <svg viewBox="0 0 1024 1024"><path class="path1" d="M848.471 928l-263.059-263.059c-48.941 36.706-110.118 55.059-177.412 55.059-171.294 0-312-140.706-312-312s140.706-312 312-312c171.294 0 312 140.706 312 312 0 67.294-24.471 128.471-55.059 177.412l263.059 263.059-79.529 79.529zM189.623 408.078c0 121.364 97.091 218.455 218.455 218.455s218.455-97.091 218.455-218.455c0-121.364-103.159-218.455-218.455-218.455-121.364 0-218.455 97.091-218.455 218.455z"></path>
</svg>
  </button>
</form>
We can then style these two HTML elements like this:
button {
  all: unset;
  cursor: pointer;
  width: 44px;
  height: 44px;
}

svg {
  color: #fff;
  fill: currentColor;
  width: 24px;
  height: 24px;
  padding: 10px;
}
We have used them all: unset; rule again to reset the button to its default. Then set a height and width of 44px this is a good size for fingers on touch screens.
Then we set the height and width of the icon and set the color to white ("#fff”).
Now our search bar is almost ready! Except nothing happens when we press the search button.
The last step for us is to hook up the button to JavaScript.
JavaScript
We are going to do a Google search when someone searches in our search bar.
To do this we need to write some code that will:
- Add an event listener to the form so we know when someone presses the search button
- Get the text value from the query box
- Build a Google URL that searches a specific site
- Opens a new tab with Google and the search query
Google allows you to search a specific site if you add site: to the query.
Here is the code that can do this:
const f = document.getElementById('form');
const q = document.getElementById('query');
const google = 'https://www.google.com/search?q=site%3A+';
const site = 'pagedart.com';

function submitted(event) {
  event.preventDefault();
  const url = google + site + '+' + q.value;
  const win = window.open(url, '_blank');
  win.focus();
}

f.addEventListener('submit', submitted);
The first thing we do is attach some variables to the form and search input box. Then we set the Google URL and set the site variable:
const f = document.getElementById('form');
const q = document.getElementById('query');
const google = 'https://www.google.com/search?q=site%3A+';
const site = 'hashnode.com';
If you want to search your site then change const site = 'hashnode.com'; to your website const site = 'example.com';.
We then create a function that will run each time someone presses the search button. The function will then open Google in a new tab in the browser:
function submitted(event) {
  event.preventDefault();
  const url = google + site + '+' + q.value;
  const win = window.open(url, '_blank');
  win.focus();
}
The last line in the code:
f.addEventListener('submit', submitted);
Add a listener to the form. It will listen for the submit button press and run the function each time.
Now when you enter a search query and press the search icon a new tab will open up with your site and the search query.
Complete Solution
<!DOCTYPE html>
<html lang='en' class=''>
  <head>
    <meta charset='UTF-8'>
    <title>Search Bar Demo</title>
    <style>
        body {
        background-color: #20a1b1;
        margin: 200px 40%;
      }

      form {
        background-color: #5bc7c9;
        width: 300px;
        height: 44px;
        border-radius: 5px;
        display:flex;
        flex-direction:row;
        align-items:center;
      }

      input {
        all: unset;
        font: 16px system-ui;
        color: #fff;
        height: 100%;
        width: 100%;
        padding: 6px 10px;
      }

      ::placeholder {
        color: #fff;
        opacity: 0.7;
      }

      svg {
        color: #fff;
        fill: currentColor;
        width: 24px;
        height: 24px;
        padding: 10px;
      }

      button {
        all: unset;
        cursor: pointer;
        width: 44px;
        height: 44px;
      }
    </style>
  </head>
  <body>
    <form role="search" id="form">
      <input type="search" id="query" name="q" placeholder="Search..." aria-label="Search through site content">
      <button>
        <svg viewBox="0 0 1024 1024"><path class="path1" d="M848.471 928l-263.059-263.059c-48.941 36.706-110.118 55.059-177.412 55.059-171.294 0-312-140.706-312-312s140.706-312 312-312c171.294 0 312 140.706 312 312 0 67.294-24.471 128.471-55.059 177.412l263.059 263.059-79.529 79.529zM189.623 408.078c0 121.364 97.091 218.455 218.455 218.455s218.455-97.091 218.455-218.455c0-121.364-103.159-218.455-218.455-218.455-121.364 0-218.455 97.091-218.455 218.455z"></path></svg>
      </button>
    </form>
    <script>
      const f = document.getElementById('form');
      const q = document.getElementById('query');
      const google = 'https://www.google.com/search?q=site%3A+';
      const site = 'hashnode.com';

      function submitted(event) {
        event.preventDefault();
        const url = google + site + '+' + q.value;
        const win = window.open(url, '_blank');
        win.focus();
      }

      f.addEventListener('submit', submitted);
    </script>
  </body>
</html>
You Can check the live demo of code on codepen